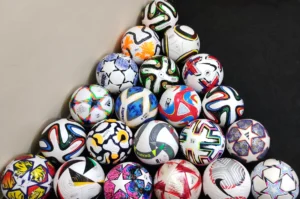
Professional players understand that a well-maintained and properly inflated soccer ball is crucial for peak performance and durability. Knowing the correct way to inflate and maintain your soccer ball is essential. Let’s break down the key steps to keep your ball in optimal condition, allowing you to focus on your game.
- Checking the Correct Pressure: Know Your Number
The right amount of air is vital for a good soccer ball. Underinflated balls feel slow and unresponsive, while overinflated balls are rock-hard, uncomfortable, and can lead to injury.
- Understanding Optimal Inflation:
Recommended Pressure: Each soccer ball is designed to perform within a specific pressure range, typically printed near the valve. You’ll see measurements in PSI (pounds per square inch) or BAR. The standard range is generally between 8.5 and 15.6 PSI, or 0.6 and 1.1 BAR. Adhering to the manufacturer’s recommendations is essential. Overinflation or underinflation significantly compromises performance and longevity.
o The Necessity of a Pressure Gauge: Relying on guesswork is unreliable. A pressure gauge provides accurate readings for precise inflation. Digital gauges offer superior accuracy, while analog gauges are a more economical, though less precise, alternative.
o Preparing the Valve and Needle: Before inserting the inflation needle, lubricate it with a small amount of glycerin or water. This facilitates smooth insertion and minimizes valve damage by preventing friction that can tear or distort delicate valve components.
- Executing the Inflation Process: A Methodical Approach
- Locating the Valve: The ball’s valve, a small opening, is located beneath a protective flap.
- Inserting the Needle with Precision: Gently and vertically insert the lubricated needle into the valve. Angling the needle can damage the valve, causing air leakage.
- Employing an Appropriate Pump: Use a hand pump or an electric pump designed for sports balls. Avoid compressed air from gas stations, as the high pressure can overinflate and damage the ball’s internal bladder. Slow, steady pumping is preferable to rapid, forceful pumping.
- Monitoring and Regulating Pressure: Continuously monitor the pressure using your gauge during inflation. Stop inflating when the recommended pressure is reached.
- Completing the Process: Carefully remove the needle and ensure the valve flap is securely closed.
- Implementing a Maintenance Guideline: Prolonging the Ball’s Lifespan
- Proper Storage Practices: Store the soccer ball in a cool, dry environment, away from direct sunlight and extreme temperatures. Avoid prolonged storage in a deflated state, as this can cause the bladder to stick together, potentially leading to damage.
- Regular Cleaning: Wipe the ball with a damp cloth after each use to remove dirt and debris. For stubborn stains, use a mild soap solution.
- Leak Detection and Prevention: Regularly inspect for air leaks. If a leak is detected, check the valve for damage. Valve core replacement may be necessary. Applying a soap and water solution to the valve and seams can help locate small leaks, indicated by bubbles.
- Surface Considerations: Minimize contact with rough surfaces like asphalt or concrete, which accelerate wear on the ball’s outer casing. Play on grass or artificial turf whenever possible.
- Preventing Overinflation: Overinflation can stretch the bladder and seams, leading to premature deterioration.
- Ball Rotation: If you have multiple soccer balls, rotate their usage to distribute wear evenly.
- Recognizing Replacement Indicators:
- Visible Damage: Tears, cuts, or significant abrasions indicate the need for replacement.
- Persistent Leaks: Leaks that cannot be repaired suggest a damaged bladder or valve.
- Shape and Bounce Irregularities: An uneven shape or inconsistent bounce signifies internal damage.
- Outer Casing Deterioration: A softened outer casing that no longer provides adequate grip means the ball needs to be replaced.
By following these comprehensive guidelines, you can ensure your soccer ball maintains optimal performance and longevity.


